Restoring a classic car is more than just a hobby; it’s a passion that connects car enthusiasts to the rich history of automotive design and engineering. Each classic vehicle has a story to tell, and bringing it back to life requires careful planning, dedication, and attention to detail. In this guide, we will walk you through the essential steps involved in restoring a classic car, ensuring that you can navigate the process with confidence.
From selecting the right vehicle to understanding the various restoration techniques, every step in the journey plays a vital role. Whether you are a seasoned mechanic or a newcomer to automotive restoration, this step-by-step approach is designed to provide clarity and guidance. We will cover important aspects such as sourcing parts, assessing the condition of the car, and implementing effective restoration strategies.
Among the challenges that may arise during the restoration process, patience and perseverance are crucial. Embracing the intricate details of restoring a classic car can lead to a rewarding experience, transforming a forgotten relic into a stunning piece of automotive history. Get ready to embark on this exciting journey as we delve into the world of classic car restoration.
Assessing the Condition of Your Classic Car

Before diving into the restoration process, it is crucial to perform a thorough assessment of your classic car’s condition. This evaluation will help you identify existing issues and determine the level of work needed to restore the vehicle to its former glory.
Exterior Inspection
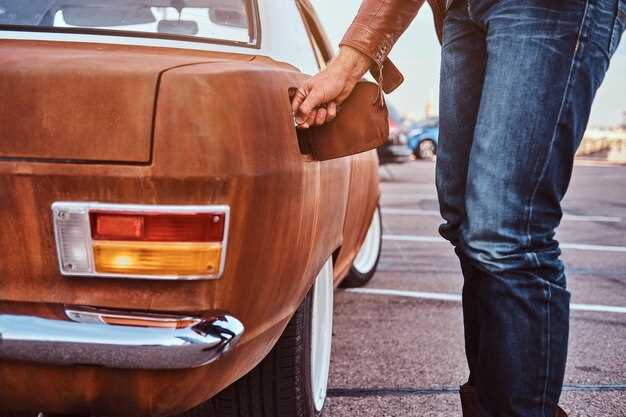
Begin by examining the car’s exterior for rust, dents, and paint conditions. Use a magnet to detect hidden rust; if it does not stick to certain areas, this suggests the presence of filler or rust underneath. Check panel alignments, which can indicate past accidents or misalignments stemming from damage.
Interior Assessment
Next, investigate the interior space. Look for wear and tear on seats, carpets, and dashboard components. Pay attention to any water damage or mildew, which can be signs of leaks. The condition of the steering wheel and pedals can indicate overall usage and care over the years.
Mechanical Evaluation
Assess the engine’s condition by inspecting the oil level and quality. Start the engine and listen for any irregular noises such as knocking or grinding. Check fluid levels (coolant, transmission fluid, brake fluid) and look for leaks. A compression test can provide insight into the health of the engine cylinders.
Chassis and Suspension Review
Inspect the chassis for signs of corrosion, especially in areas prone to moisture accumulation. The suspension system should be examined for any worn-out components or signs of damage. A thorough inspection here will help determine the ride quality and safety of the vehicle.
Electrical System Check
Test all electrical components, including lights, horn, and wipers. Ensure that the wiring is in good condition and that there are no shorts or exposed wires. Examine the battery and alternator for performance issues, as these are critical to the vehicle’s operation.
Documentation and History
Lastly, gather any available documentation related to the car’s history, including service records and previous restoration work. This information can provide valuable insights into the vehicle’s past and help guide your restoration efforts.
Taking the time to assess the condition of your classic car thoroughly will not only save time and resources down the line but will also enhance the overall restoration experience. Knowing what you are working with allows for better planning and more effective execution of the restoration process.
Finding the Right Parts and Tools for Restoration

Restoring a classic car requires careful consideration in sourcing the right parts and tools. The quality and authenticity of these components directly influence the success of your restoration project. Here are key strategies to ensure you find what you need.
Research Specifics
Begin by identifying the make, model, and year of your vehicle. This information is crucial for finding parts that fit correctly. Utilize online forums, restoration guides, and classic car clubs to gather information on common issues and suitable sources for parts.
OEM vs. Aftermarket Parts
Decide between Original Equipment Manufacturer (OEM) parts and aftermarket alternatives. OEM parts are made by the original manufacturer and often provide better quality and fit, while aftermarket parts might offer cost savings. Weigh the importance of authenticity against budget considerations.
Utilize Online Marketplaces
Search online platforms like eBay, Amazon, and specialized classic car parts websites. Filter your search to find parts that match your vehicle’s specifications. Read reviews and check seller ratings to ensure reliability and quality.
Visit Local Salvage Yards
Local salvage yards can be treasure troves for vintage car parts. Talk to the owners or staff to inquire about specific parts you need. Sometimes, you can find hard-to-locate components at a fraction of the cost compared to retail outlets.
Network with Other Enthusiasts
Joining classic car clubs or online communities can provide invaluable leads on where to find parts. Networking allows you to tap into a wealth of knowledge and experience from fellow enthusiasts who may have insights on where to find specific items.
Invest in Quality Tools
Choosing the right tools is essential for efficient restoration. Invest in high-quality hand tools, power tools, and safety equipment. A comprehensive toolkit may include wrenches, screwdrivers, pliers, and specialized tools for tasks like bodywork or engine rebuilds.
Consider Renting or Borrowing Tools
If certain tools are needed infrequently, consider renting them from local hardware stores or borrowing from friends who are in the restoration hobby. This approach can save you money and storage space while still providing access to necessary equipment.
Stay Organized
Keep an inventory of the parts you acquire and the tools at your disposal. Documenting what you have can prevent duplicate purchases and assist in tracking progress throughout the restoration process.
By following these strategies to find the right parts and tools, you set the foundation for a successful classic car restoration project. Quality components and proper tools not only streamline the process but also enhance the overall outcome of your restoration efforts.
Executing a Successful Paint and Finish Job
Painting a classic car requires meticulous preparation and execution to achieve a professional finish. Begin by selecting a suitable workspace that is clean, well-ventilated, and free from dust and debris. Protect surrounding areas from overspray with drop cloths or plastic sheeting.
Surface Preparation is critical. Start by thoroughly washing the car with soap and water to remove dirt and grease. Next, inspect the surface for rust, dents, or imperfections. Address these issues by sanding, filling, or applying primer as necessary. Use a fine-grit sandpaper to smooth out the surface, ensuring it is level and ready for painting. After sanding, wipe the area clean with a solvent to remove any sanding dust and residue.
Once the surface is prepared, choose high-quality paint appropriate for the vehicle. Acrylic urethane or epoxy paints are popular options due to their durability and finish quality. Invest in good quality clear coat for added protection and shine. Prepare the paint according to the manufacturer’s instructions, ensuring proper mixing of hardeners and reducers.
Next, don protective gear, including a respirator, goggles, and gloves. This step is vital for personal safety, as paint fumes can be hazardous.
When applying paint, use a spray gun for even coverage. Start with a light, mist coat to help the paint adhere better. Follow this with several medium wet coats, maintaining a consistent distance from the surface to avoid runs and sags. Allow adequate drying time between each coat as per the paint manufacturer’s recommendations.
After achieving the desired color depth, apply a clear coat to protect the color and provide a glossy finish. Follow the same application technique as with the color paint, ensuring even coverage. Allow the clear coat to cure fully, which may take several days, depending on the product used.
Finally, after the finish has hardened, polish the surface with a high-quality automotive polish to enhance the gloss and remove any imperfections. Use a microfiber cloth and work in small sections to avoid swirls.
Executing a successful paint and finish job requires attention to detail and patience. With proper preparation and technique, the results can rejuvenate a classic car, enhancing its appearance and value.
